Imagine walking into your Franklin backyard on a Tuesday morning to find a massive excavator positioned to tear into your lawn. It’s a sight that causes 85 percent of homeowners to feel a mix of excitement and genuine anxiety about the mess ahead. You likely agree that while a custom pool is the best way to protect your family’s summer downtime, the technical jargon and phases of the gunite pool construction process can feel overwhelming. You want a backyard retreat, not a permanent construction zone or a series of expensive surprises hidden beneath the dirt.
We believe you deserve total peace of mind while we build your dream. This guide explains every milestone in detail, from the first scoop of Tennessee clay to the moment you take your first dip in your Nashville area oasis. We’ll clarify the structural superiority of gunite over shotcrete and show you how we navigate the unique limestone shelf common in Middle Tennessee landscapes. You’re going to get a clear, step-by-step timeline and the confidence to start your project with a local partner who treats your property like their own.
Key Takeaways
- Master the initial design and permitting phase to ensure your custom vision meets all Middle Tennessee regulations with ease and precision.
- Prepare for the excavation stage by learning how we tackle the regional “limestone factor” using specialized equipment and local expertise.
- Explore the gunite pool construction process to understand how high-velocity concrete creates a rock-solid structural shell designed for lifelong durability.
- Identify the essential plumbing and tile requirements that safeguard your investment against leaks while enhancing your home’s long-term value.
- Learn the vital “Big Fill” rules for your interior finish to protect your pool’s structural integrity and prepare your backyard for its first splash.
Phase 1: Design, Permitting, and Site Preparation
Your dream backyard starts long before the first shovel hits the dirt. The gunite pool construction process begins with a precision-engineered plan tailored to the unique topography of Middle Tennessee. We use advanced 3D design software to visualize how your pool sits against the rolling hills of Franklin or the limestone-rich soil of Mt. Juliet. This phase ensures we protect your home’s foundation while maximizing your property’s natural beauty. During this initial design stage, we determine the specific application methods for your pool shell. Most homeowners choose this route because Shotcrete and gunite offer unmatched structural integrity and flexibility for custom shapes. We focus on creating a layout that respects your land’s natural drainage patterns and existing structures.
Local Permits and HOA Approvals
Building codes in Middle Tennessee vary significantly by municipality. In Davidson County, pool setbacks typically require a 10-foot distance from property lines, while Wilson County regulations often change based on specific lot size and zoning. We handle the heavy lifting of the administrative process, which usually takes between 4 and 8 weeks in the Nashville metro area. To speed up HOA architectural reviews, we provide detailed site plans and material samples that demonstrate how the project maintains the community’s aesthetic standards. Our goal is to secure every necessary signature so your project moves forward without legal or neighborhood friction.
The Layout and Forms
Once permits are in hand, we transition from paper to the physical world. We use wooden form boards to create a physical outline of your pool’s footprint directly on your lawn. This allows you to see the exact scale and placement before any excavation begins. We verify every dimension twice to ensure the gunite pool construction process stays on track. A critical part of this step is setting the “benchmark” elevation. This fixed reference point ensures the pool sits at the perfect height to facilitate proper water runoff away from your home. We also coordinate the 811 utility mark-out during this time. This mandatory safety check identifies underground gas, water, and electrical lines, protecting your home’s vital infrastructure from accidental damage during the dig. This meticulous preparation guarantees that the finished pool accounts for future decking heights and integrates perfectly with your existing landscape.
Phase 2: Excavation and the “Big Dig”
After the layout is marked and approved, heavy machinery moves in to begin the physical transformation of your backyard. This is often the most dramatic stage of the gunite pool construction process, as we remove hundreds of cubic yards of dirt to create the footprint of your new oasis. You can expect to see excavators and dump trucks working efficiently to clear the space while our team monitors the dig depth with laser precision. Our goal is to minimize disruption to your daily life while maintaining a clean, safe job site.
Beyond just moving dirt, we install the rough plumbing during this phase. This involves setting the main drains and skimmer lines deep into the floor and walls. Once the bulk of the earth is moved, our crew performs the meticulous task of hand-trimming. We use shovels and picks to refine the walls and floor to match your design’s exact specifications. This manual detailing ensures the pool shape is perfect before we move to the structural phase. For a clearer picture of how this fits into the overall schedule, you can review this gunite pool construction timeline to see what follows the excavation.
Navigating Middle Tennessee Soil Conditions
Building in Lebanon or Brentwood often means dealing with the region’s dense limestone shelf. If our equipment hits solid rock, which occurs in approximately 65% of local digs, we bring in specialized rock hammers to break through the subterranean layers. We don’t just dig around obstacles; we ensure the ground is stable and properly graded. This prevents future shifting and protects your investment. If you have concerns about your specific lot, we can evaluate your backyard terrain during a site visit to plan for these geological factors.
Structural Steel Rebar Reinforcement
Once the hole is shaped, we build the “skeleton” of your pool. Our crew installs high-tensile steel rebar in a grid pattern across the entire floor and walls. Rebar is the internal cage that prevents gunite from cracking under pressure. We use concrete “chairs” to hold the steel at a specific distance from the dirt. This ensures the gunite fully encases the metal, creating a unified structure that withstands the immense weight of the water. This phase provides the structural integrity that allows us to offer long-term warranties on our shells.
Phase 3: The Gunite Application and Curing Process
The gunite pool construction process reaches its most transformative milestone during the application phase. This is the day your backyard stops looking like a construction site and starts looking like a pool. Gunite is a specialized dry-mix concrete that stays in a hopper until it’s pushed through a high-velocity nozzle. We mix it with water at the very last second as it sprays, creating a dense, incredibly strong structure that forms the permanent shell of your pool. Watching our team “shoot” the gunite is a highlight for many Middle Tennessee homeowners, as custom benches, steps, and sun shelves take shape in a matter of hours.
While the application is fast, the curing is a marathon. A standard gunite shell requires a 28-day period to reach its full design strength. During this time, the concrete undergoes a chemical reaction called hydration. We rely on you to play a vital role in this phase to ensure the integrity of the shell. By following a strict watering schedule, you protect what matters most and ensure your investment lasts for decades.
Gunite vs. Shotcrete: Why We Use Gunite
We choose gunite over shotcrete because it offers superior control and durability for the unique topography of Middle Tennessee. Since gunite is a dry-mix, our craftsmen can adjust the water content on the fly. This precision allows us to sculpt intricate features like zero-entry beach entries or deep-end swim-outs with better accuracy than wet-mix shotcrete. In our local climate, where temperatures can swing 40 degrees in a single week, gunite provides a higher compressive strength. This density is essential for resisting the natural expansion and contraction of our regional clay soils, ensuring your pool shell remains watertight and structurally sound.
The Seven-Day Watering Ritual
Once the gunite is applied, the “Seven-Day Watering Ritual” begins. This task is the homeowner’s primary responsibility to prevent “shrinkage cracks” that can occur when the outer layer of concrete dries faster than the interior. Follow these steps to ensure a perfect cure:
- Frequency: Use a garden hose to spray down the entire gunite shell at least twice daily.
- Coverage: Start at the top of the walls and let the water run down to the floor. Ensure every square inch of the gray surface is dark and wet.
- TN Heat Protocol: If we are building during a typical 90-degree Tennessee July, increase watering to three times daily to combat rapid evaporation.
- Monitoring: You might see small amounts of water ponding in the deep end; this is normal and actually helps the floor cure evenly.
During these first seven days, the concrete gains approximately 70 percent of its total strength. You might notice small “crazing” lines on the surface, which are superficial and expected. However, consistent hydration prevents these from becoming structural issues. Our local team will check in regularly during this 28-day window to monitor the shell before we move on to the tiling and coping phase.
Phase 4: Plumbing, Tile, and Coping Installation
Once the gunite shell cures, our team shifts focus to the intricate systems that keep your water moving and the finishes that define your aesthetic. This stage of the gunite pool construction process transforms a raw concrete structure into a functional, beautiful backyard centerpiece. We begin by finalizing the plumbing lines and setting the equipment pad, which acts as the brain of your entire pool system.
Precision is our priority during this phase. We conduct a rigorous pressure test on every line. Our technicians maintain a steady 35 to 40 PSI for a minimum of 24 hours to guarantee a leak-free build. This step provides the peace of mind you deserve before we move toward the final aesthetic touches. We treat your property with the same care we would our own, ensuring every pipe and fitting meets our high standards for durability.
Selecting Your Finish Materials
The waterline tile serves a dual purpose. It provides a vital waterproof seal where the water meets the air and prevents staining on the pool shell. For 2026, Franklin and Brentwood homeowners are gravitating toward larger format porcelain tiles and iridescent glass mosaics that capture the Tennessee sun. When selecting coping, you must choose between the organic beauty of natural stone or the sleek lines of pre-cast concrete. Natural travertine remains a top choice because it stays 20% cooler underfoot than darker materials during hot July afternoons. You can explore our custom gunite pool designs to see how these materials work together in local landscapes.
For homeowners who want to see how high-end masonry and softscaping can further elevate these designs, looking at the portfolio of Artech Landscaping & Construction provides excellent examples of how to integrate a pool into a complete outdoor living environment.
Electrical and Equipment Setup
We install high-efficiency variable speed pumps that can reduce energy consumption by up to 90 percent compared to older, single-speed models. Your equipment pad also houses advanced sanitation systems like salt-chlorine generators or UV systems, which provide a gentler swimming experience for your family. We focus on modern convenience by setting up full automation. This allows you to manage the following features directly from your smartphone:
- Adjusting water temperature for your heater or heat pump.
- Changing the colors of your energy-efficient LED lighting.
- Activating water features or spa jets remotely.
- Monitoring chemical levels for a perfectly balanced pool.
Our goal is to protect what matters most by using only the highest quality components that stand the test of time. We believe that local expertise makes the difference in a successful build. Contact Marlin Exteriors today to schedule a consultation and bring your vision to life with a team you can trust.
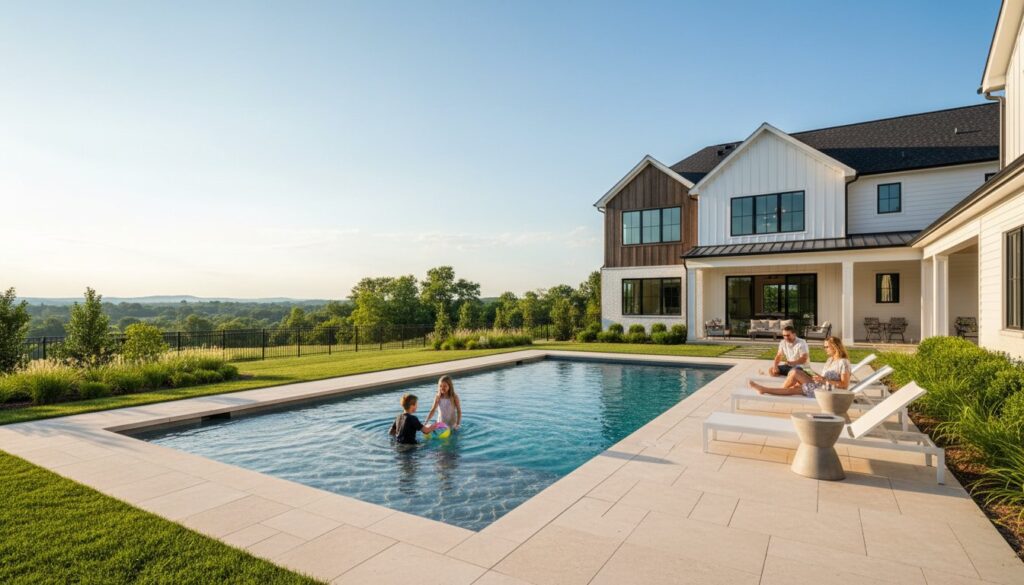
Phase 5: Interior Finish, Filling, and Startup
The final phase of the gunite pool construction process transforms a structural shell into a vibrant, waterproof oasis. This stage begins with the application of the interior finish, which serves as the pool’s primary aesthetic feature and protective skin. Homeowners in Middle Tennessee typically choose between traditional white plaster, quartz aggregates, or premium pebble finishes. While standard plaster offers a classic look, quartz and pebble finishes provide enhanced durability and a lifespan that often exceeds 15 to 20 years. Our team applies these materials with precision, ensuring a uniform texture that feels comfortable underfoot and stands up to local climate shifts.
Once the finish is applied, the “Big Fill” begins immediately. This is a critical moment where timing is everything. You must keep the water running continuously until it reaches the middle of the waterline tile. If the water flow stops before the pool is full, it can leave a permanent “bathtub ring” or tide mark on the new plaster. Depending on your home’s water pressure and the pool’s total gallonage, this process usually takes 24 to 48 hours. Our experts monitor this transition closely to ensure the integrity of the finish remains intact during the initial submersion.
Protecting Your Investment with Proper Plastering
The interior finish is the most delicate part of the pool because it requires a specific chemical environment to cure correctly. Because the material cures underwater, the first 48 hours dictate the long-term smoothness and color consistency of the surface. We take extra care to avoid staining or scaling by managing the water chemistry from the moment the hose starts. You can read more about how we maintain these high standards in our guide on expert pool plastering. This proactive approach prevents calcium carbonate from leaching out, which protects your gunite pool construction process from common early-stage defects.
Starting Your First Swim Season
Your pool requires a 30-day “break-in” period to ensure the finish hardens properly. During the first 14 days, you must brush the pool walls and floor twice daily. This essential task removes plaster dust and prevents it from scaling onto the surface. It’s also vital to wait at least 30 days before turning on the pool heater or the salt chlorine generator. Introducing high heat or salt too early can cause permanent damage to the curing material.
Before we hand over the keys to your new backyard, a Marlin Exteriors expert will host a “Pool School” session. We walk you through every component of your equipment pad, show you how to test your water, and explain the filtration cycles. We want you to feel like a confident pro before your first swim. If you’re ready to bring your vision to life with a team that values craftsmanship and local integrity, contact Marlin Exteriors for a consultation today. We take pride in building pools that protect your investment and provide a lifetime of memories.
Bring Your Backyard Vision to Life
Navigating the gunite pool construction process doesn’t have to be overwhelming when you have a clear plan. By breaking down the timeline from the first dig to the final startup, you can see how each phase builds the foundation for a lifetime of summer memories. You’ve learned how critical it is to manage site preparation and why the curing process ensures your pool’s structural integrity.
At Marlin Exteriors, we’ve spent 20+ years mastering the unique terrain of Middle Tennessee. Our A+ rated team specializes in navigating the dense Nashville limestone that defines our local landscape. We prioritize precision and protection, ensuring your home remains your most valuable asset throughout the renovation. You deserve a partner who understands the local soil and the high standards of our community. We handle the complex logistics so you can focus on the excitement of your new outdoor lifestyle.
Start Your Custom Gunite Build with a Free Consultation
We’re ready to help you create the perfect retreat for your family.
Frequently Asked Questions
How long does the gunite pool construction process take in Nashville?
In Nashville, the gunite pool construction process typically takes 8 to 12 weeks from the initial excavation to the final plastering. This timeline accounts for the 28-day curing period required for the concrete to reach its full structural integrity. While 15% of projects might face delays due to Middle Tennessee’s unpredictable spring rain, we manage the schedule tightly to ensure your backyard is ready for summer.
What is the difference between gunite and shotcrete?
Gunite uses a dry-mix process where water is added at the nozzle during application, while shotcrete arrives at your home as a wet, pre-mixed product. We prefer gunite for its superior durability and the ability to adjust the mix on-site for precise craftsmanship. This method allows our team to create a stronger bond and more intricate shapes for your custom pool design.
Will the excavation damage my existing landscaping or driveway?
Excavation requires heavy machinery like 20-ton excavators, so you should expect some impact on your grass and immediate landscaping. We protect your driveway by using 3/4-inch plywood sheets or specialized mats to distribute the weight of the equipment. Our team creates a designated access path to minimize the footprint and ensures 100% of the debris is hauled away once the dig is finished.
Can you build a gunite pool in Tennessee during the winter?
You can build a gunite pool in Tennessee during the winter months, provided the ground isn’t frozen and temperatures remain above 40 degrees Fahrenheit during the pour. Starting in January or February is a smart strategy because it ensures your pool is finished by the first warm days of May. We monitor local weather patterns daily to schedule structural phases during safe temperature windows.
What happens if you hit rock during the pool excavation?
If we encounter the limestone common in Middle Tennessee, we transition from standard buckets to hydraulic hammers or “ram hoes.” Roughly 40% of Nashville area pool builds require some level of rock breaking. We identify these conditions early during the initial dig and work efficiently to keep the project moving without compromising the structural layout or your timeline.
How long do I have to wait to swim after the plaster is finished?
You can typically dive in 7 to 10 days after the plaster is applied and the pool is filled with water. This waiting period allows the chemicals to balance and the finish to set properly. We provide a specific start-up protocol that involves brushing the surface twice daily for the first 14 days to ensure a smooth, long-lasting finish that protects your investment.
Is a gunite pool worth the investment compared to fiberglass?
Gunite pools offer 100% customization in shape, depth, and features, which fiberglass shells simply cannot match. While fiberglass is limited to factory molds, gunite provides a permanent structure that integrates seamlessly with your home’s architecture. Most homeowners find the gunite pool construction process yields a higher resale value because the pool is built as a permanent part of the Tennessee landscape.
Do I need a fence around my pool during construction in Mt. Juliet?
Mt. Juliet building codes and the International Swimming Pool and Spa Code require a 48-inch safety fence throughout the construction process. We install temporary orange safety fencing as soon as the excavation begins to protect your neighbors and pets. Before the final inspection, you’ll need a permanent barrier with self-closing, self-latching gates to meet 100% of local safety regulations and insurance requirements.